1. Installing the electrostatic sticker
Clean your windshield and put the electrostatic sticker on the recommended area as shown in the figure. Avoid the edge of the windshield and select the flat and smooth area for the installation.
Make sure you remove air bubbles between the sticker and the glass.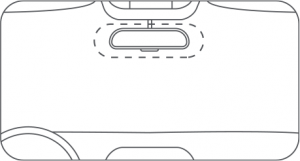
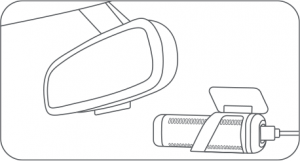
2. Inserting the dash cam into the bracket
Insert the dash dam into the bracket with the power port facing inside until you hear a click sound. And then the dash cam is well installed.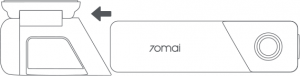
3. Connecting the power cord
Connect the power cord to the Type-C power port of the dash cam. Pull the power cord to make sure that it is well connected.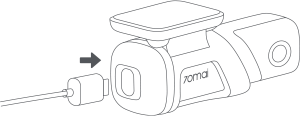
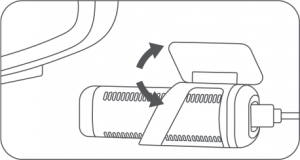
4. Pasting the bracket
Rotate the mount of the bracket and make the heat resistant adhesive face toward the front windshield.
Peel off the protective film from the heat resistant adhesive, and paste the bracket on the electrostatic sticker in the dotted area.
Press the mount to make sure it is firmly attached on the electrostatic sticker.
5. Connecting the power supply
As shown in the figure, run the power cord along the top of the windshield, down the A-pillar, and around the glove compartment, so that the power connector is near the cigarette lighter. Connect the power cord to the car charger, then plug the charger into the cigarette lighter socket.
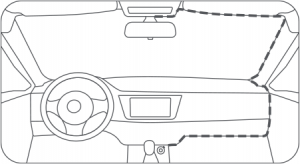
Note: Depending on the vehicle, the cigarette lighter socket may be located in a different position. The figure provided is for reference only.
6. Adjusting the dash cam angle
Connect the dash cam with the 70mai app.
Turn on the dash cam and adjust the camera angle based on the preview screen on the app.