Step 1. Locate your fuse box
Refer to the vehicle’s user manual and locate the fuse box.
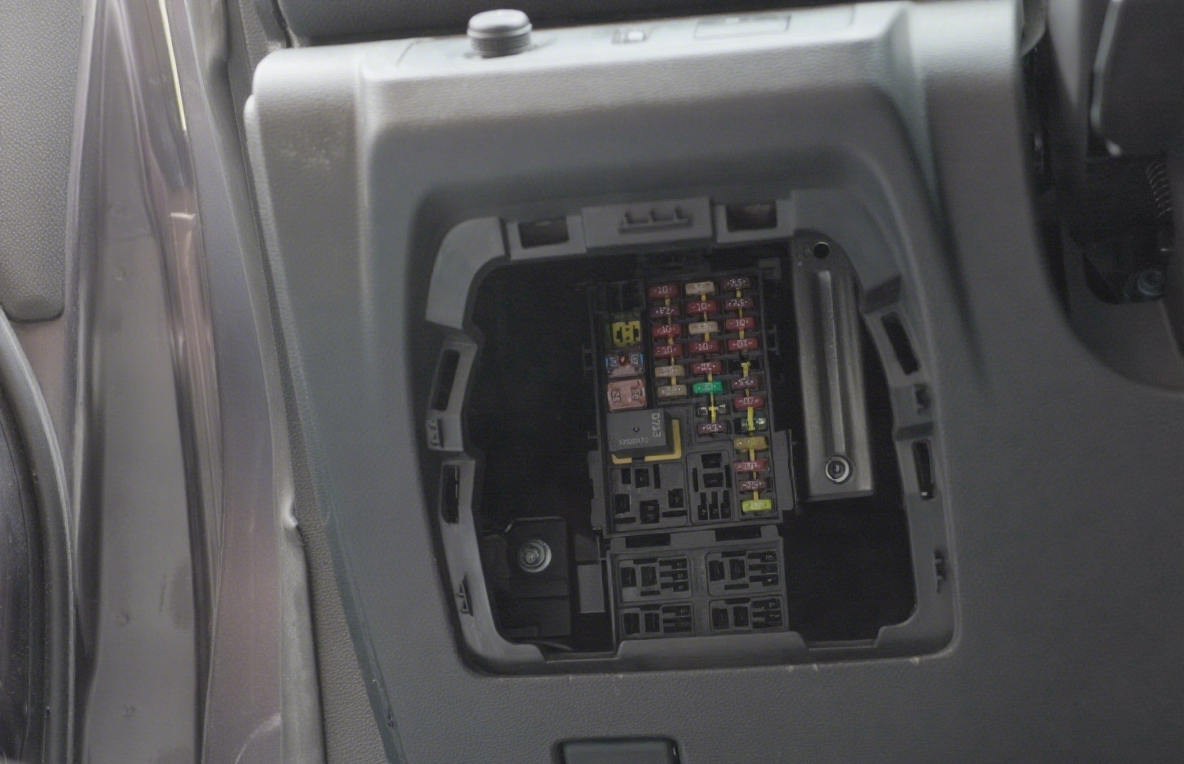
Notes:
- Make sure that the car’s engine and power has been turned off before locating or operating the fuse box.
- The location and shape of the fuse box may vary among vehicles. The image is for reference only. For specific details, refer to the vehicle’s user manual or consult with the automotive dealership.
- If you are unable to locate the fuse box or lack of knowledge in the electrical system, please ask a professional technician to perform the installation to avoid any accidents.
Step 2. Find the suitable fuses
Refer to the vehicle’s user manual or use a multimeter to find the fuses in the following specifications.
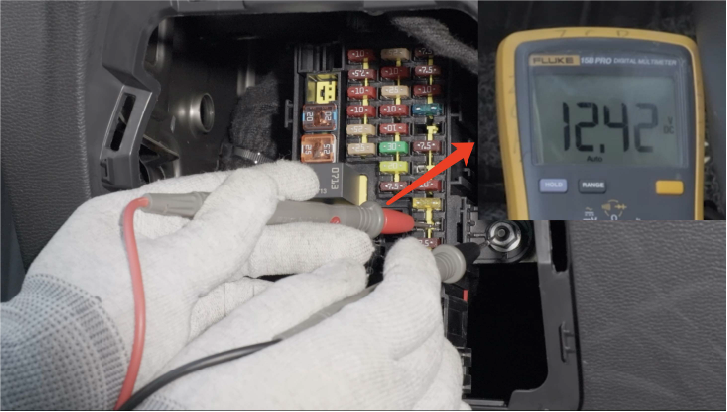
- The regular electric fuse with an output voltage of 12–30V.
- The ACC power fuse.
- The regular electric fuse provides constant power when the vehicle’s engine turns off.
- The ACC power fuse only provides power when the key is turned to ACC ON position and stops providing power when the vehicle’s engine turns off.
Once identified, remove those two fuses.
| Vehicle state | Regular electric fuse | ACC power fuse |
|---|---|---|
| Ignition off | Around 12 V | 0 V |
| Ignition on | Around 12 V | 12 V |
Step 3. Connect the power cable and ACC signal cable
- Choose the correct fuse taps(ATO, Micro2, Mini,or Low-Profile) and insert the removed fuse into the vacant slots on the chosen fuse taps. Make sure your original fuse is inserted closer to the pins on the add-a-fuse cables.
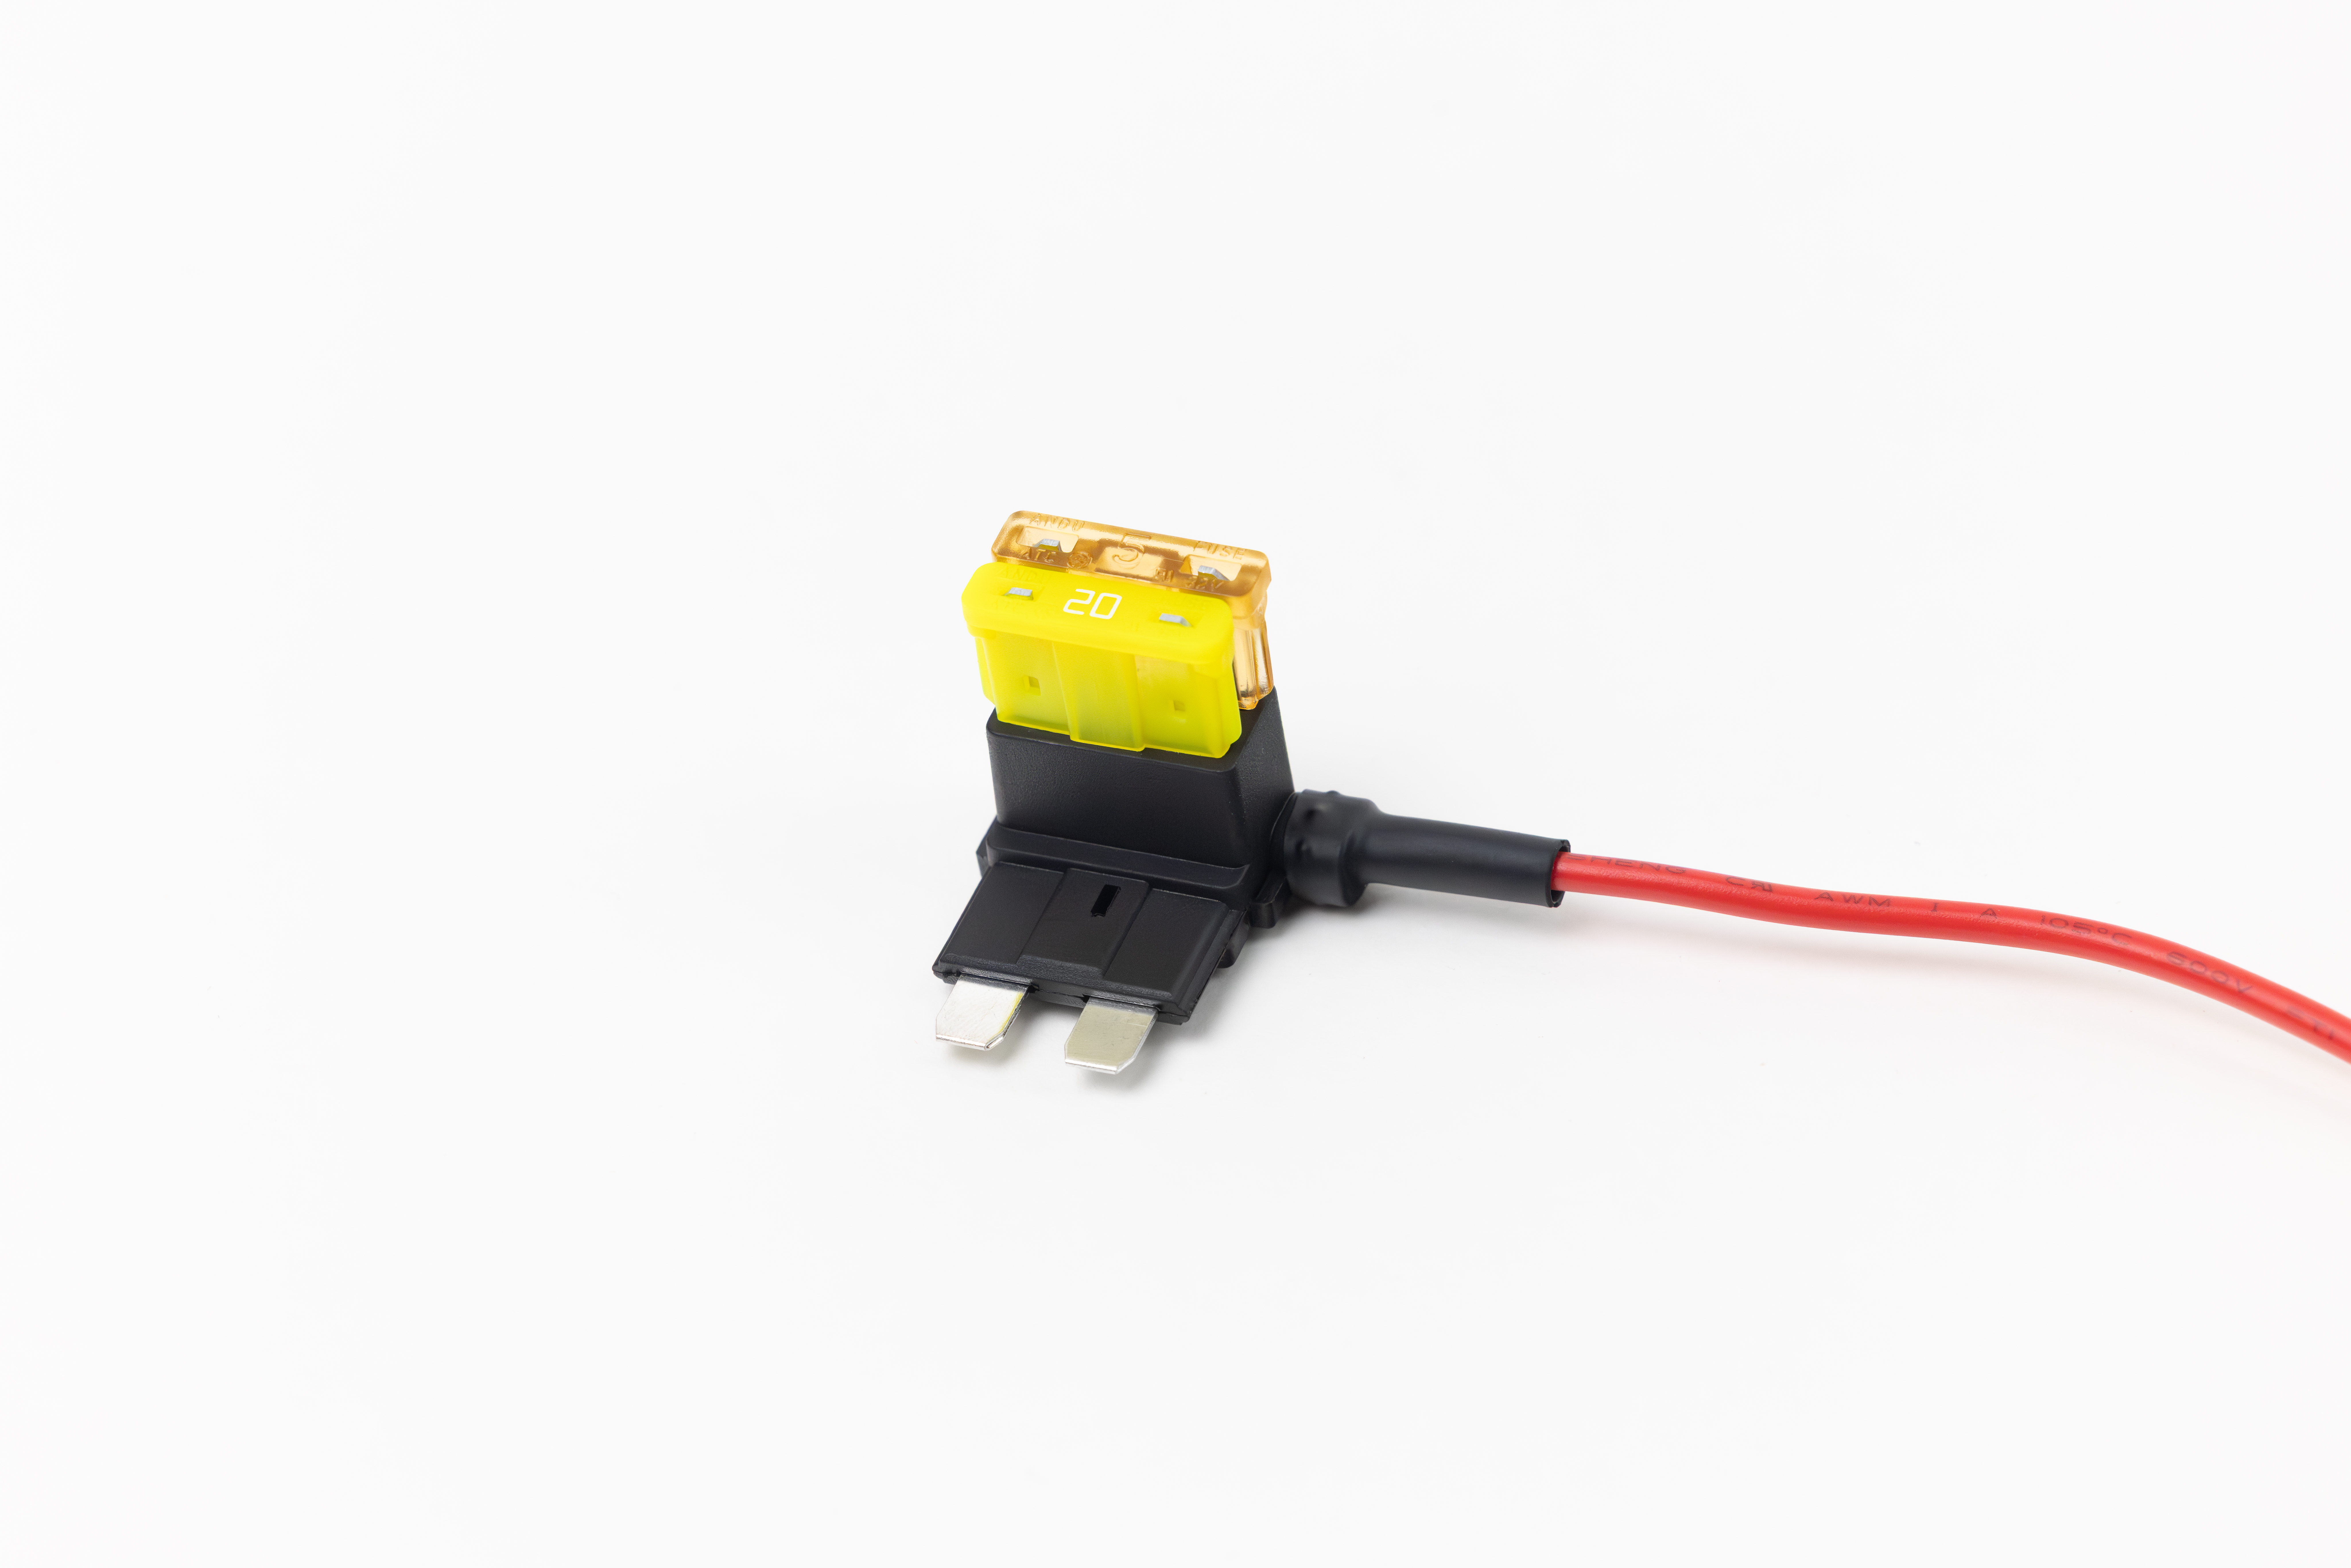
- Align the open barrel terminal (red, tagged VCC+) of the hardwire kit with the insulated crimp terminal of the electric add-a-fuse cable.

- Crimp the connection.

- Pull back the insulation sleeve to cover the connection.

- Repeat sub-steps 2–5 for the chosen fuse tap for the ACC cable(yellow, tagged ACC).
Step 4. Insert the fuse taps and connect the ground wire
- Insert the fuse tap connected to the VCC+ cable into the slots of the regular electric fuse that you measured in Step 2.
- Insert the fuse tap connected to the ACC cable into the slots of the ACC power fuse that you measured in Step 2.
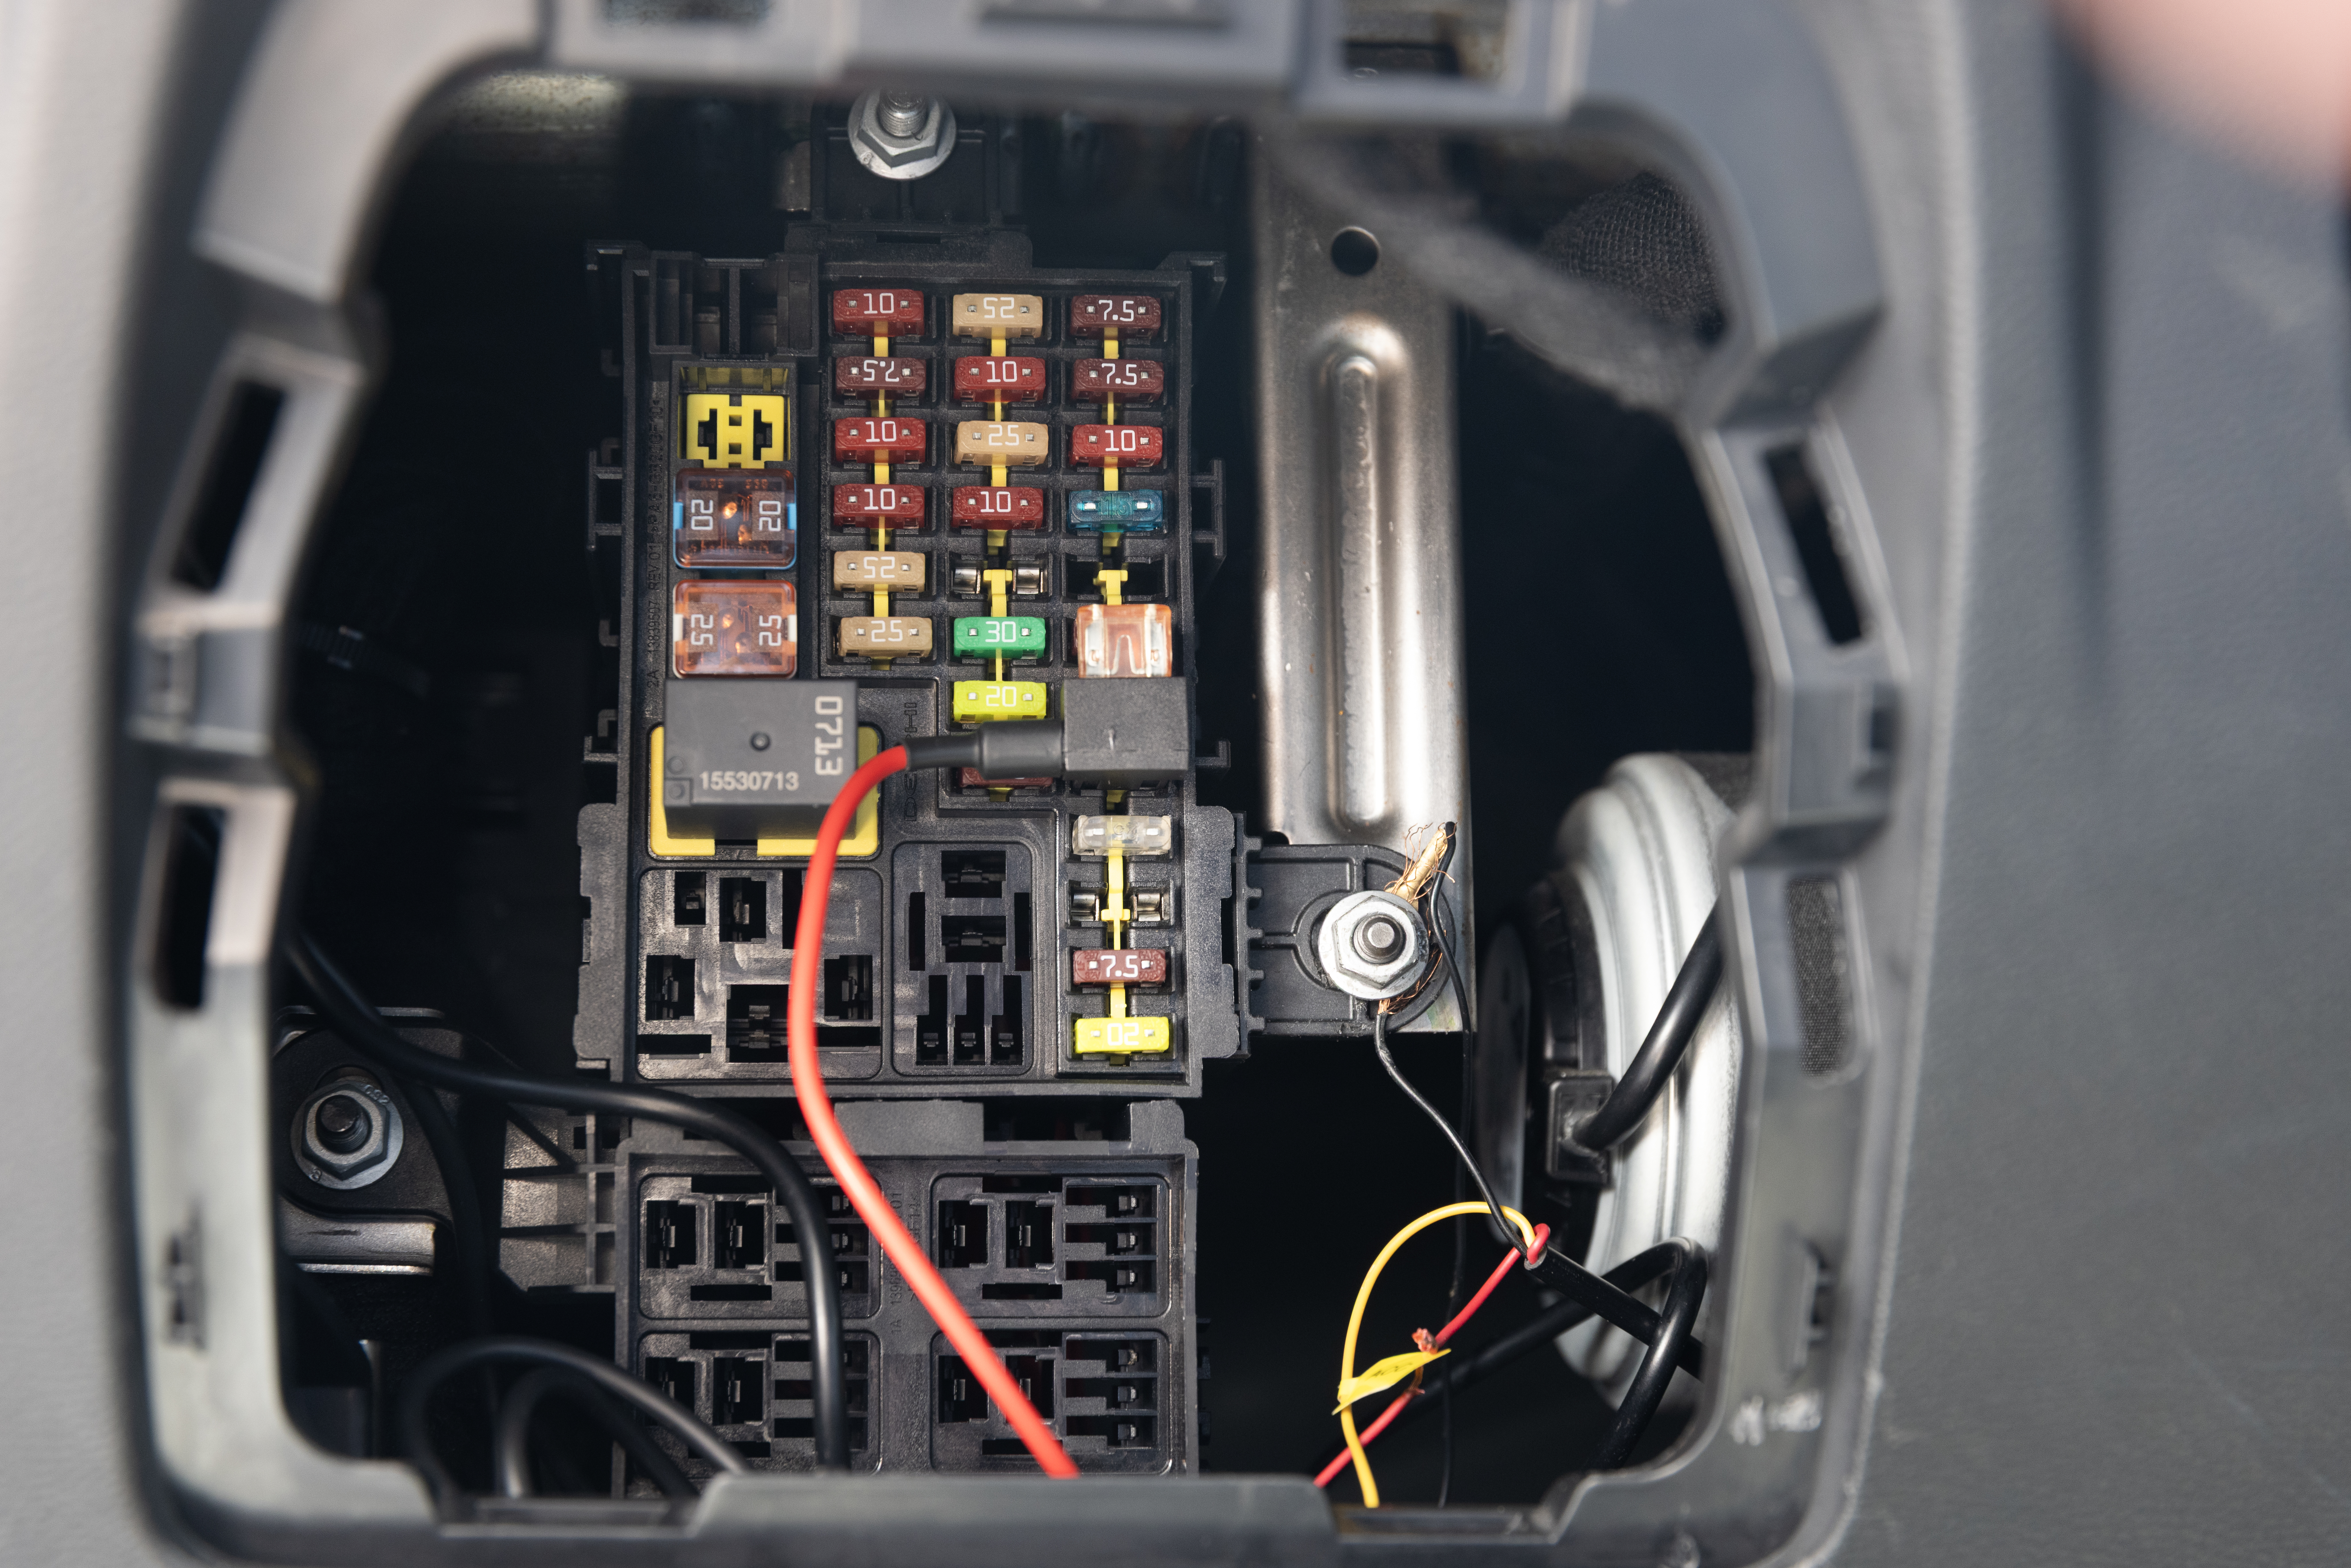
- Bolt the ground wire (black) of the hardwire kit to the grounding screw or chassis of the vehicle.
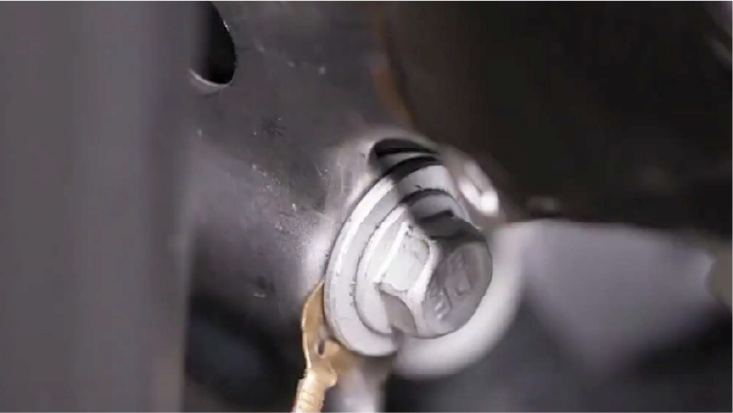
- Fasten the bolt.
Step 5. Test the connection and ACC signal
- Connect the Type-C connector of the hardwire kit to the power outlet of the main device (DC/IN). Start the engine and wait for the main device to turn on.
If the main device fails to power on, turn it on manually. If the message “Connect to an external power source” is shown, check the power cable of the hardwire kit to see if it is correctly connected to the regular electric fuse. - After the main device has turned on, turn off the engine and remove the key. Check if the main device powers off.
For some cars, the ACC power off signal will only be triggered when the driver seat door is opened after the engine is turned off. Some car models will only trigger the ACC power off signal after the engine has been turned off for a certain period of time. For such cars, observe for some time after the ACC power is turned off to check if the main device powers off. - After the main device powers off, restart the engine and check if the main device automatically turns on.
- If the above steps can be proceeded correctly, the circuit and ACC signal test is passed.
- If the circuit and ACC signal test fails, please check the wiring of the hardwire kit and ensure that the fuse and ground are correctly connected.
- If the connection is correct, but the test fails, contact after-sales service for assistance.
Step 6. Test the parking surveillance function
- When the main device turns on, enable the parking surveillance function on the device or the 70mai app (when the main device is connected to the app)
- Allow the vehicle to run for approximately 1 minute, then turn off the engine and observe if the main device automatically enters parking surveillance mode.
- If the main device enters the specific mode, the connection is normal.
- If not, ensure that the cable is firmly connected, and then restart the vehicle. Allow it to run for approximately 1 minute again, then turn off the engine and observe if the main device enters parking surveillance mode.
Step 7. Set a low-voltage protection value
This voltage value protects your car battery from over-discharging. The idea is that the lower the voltage is set, the longer the parking surveilance can work. If the detected voltage of the battery has been below the set voltage for 3 minutes, then the kit instantly cuts off the power to the cam, protecting the battery from draining.
Set the value according to the capacity of your battery (normally 12V or 24V) and the time you need the parking surveillance to work for.

Step 8. Manage the cable
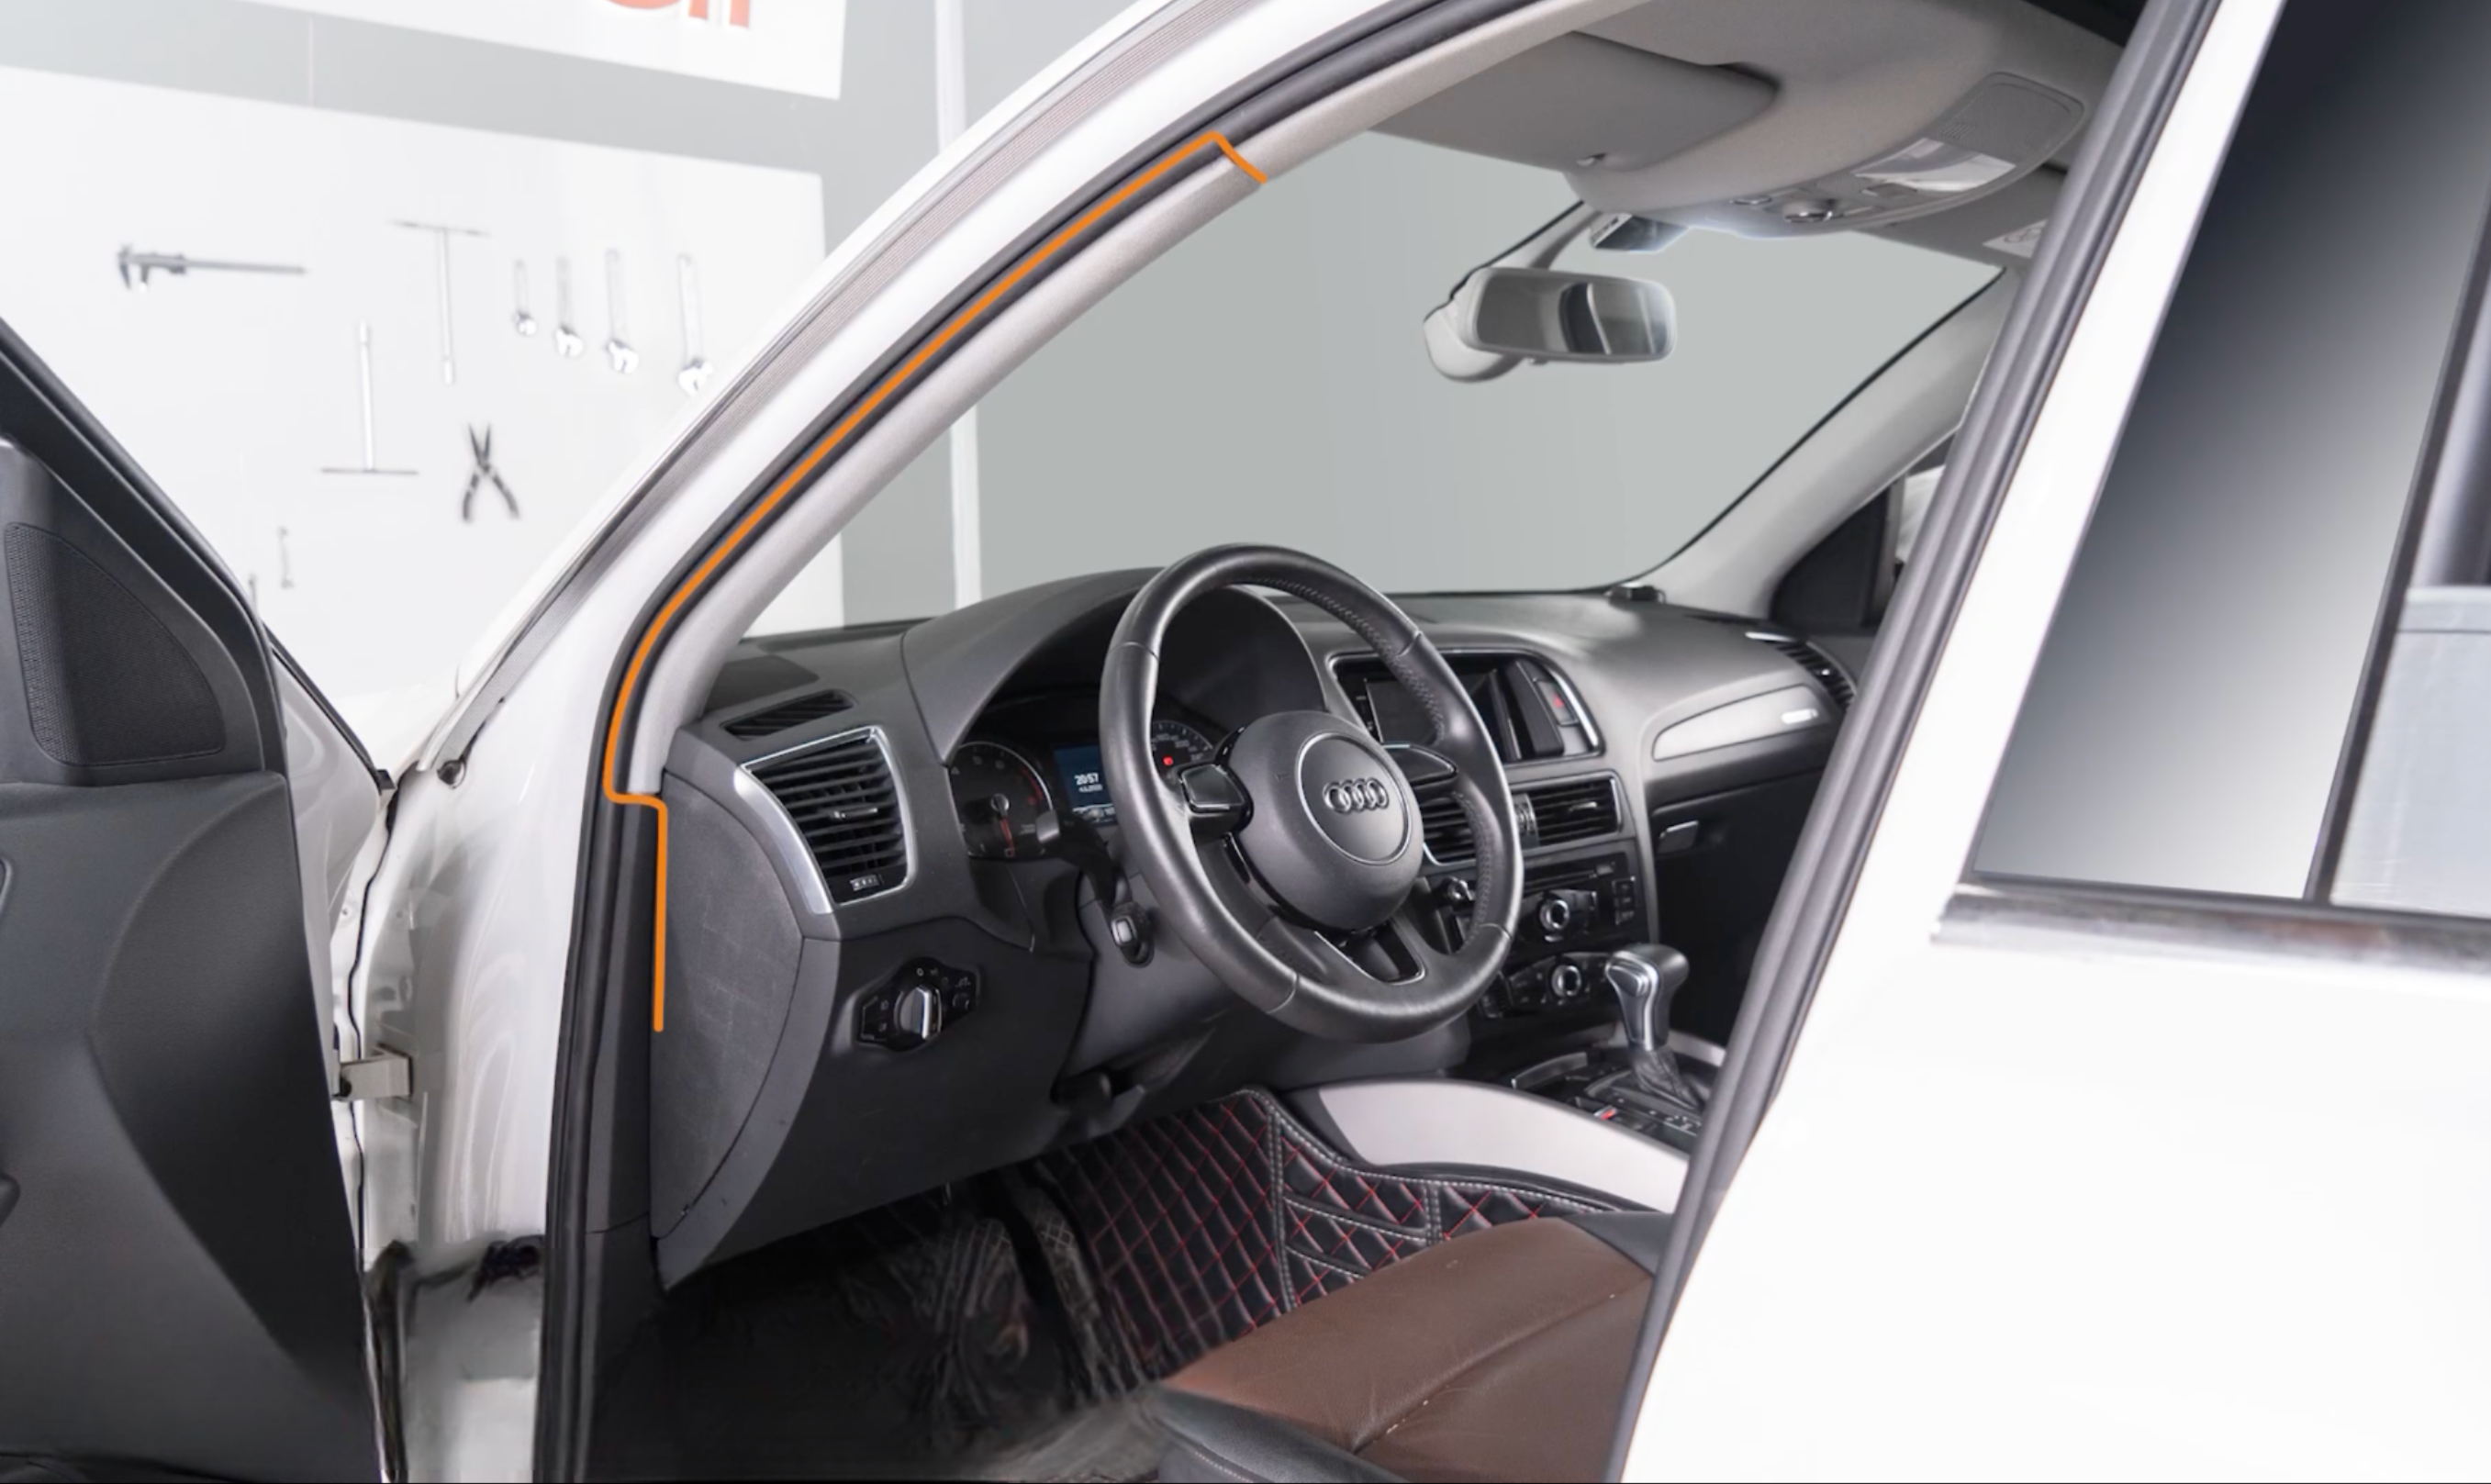
Route the hardwire kit to the location of the main device.
If the hardwire kit is too long, tie it up, but do not cut it. Cutting the hardwire kit will affect the power and ACC signal to the main device.
Notes:
- The actual installation and wiring path of the hardwire kit may differ from the illustrations in the manual. Please seek assistance from a professional technician.
- Before installation and wiring, please turn off the car engine and power to prevent short circuit.